I starting to learn a bit about DaVinci Resolve for some video tutorial production. Fusion has a node/graph based editor for compositing which reminds me a lot about pipelines and unreal engine blueprints.Quite interesting, readable and powerful. Still, overwelming for a beginner to the tool, like me. This tutorial is a great intro into what the components are in Fusion and how it all comes together.
My notes & takeaways (19)
On Compositing
Essentially, it’s layering media elements (video, images, text, forms, effects, …) onto each other to produce the final video frame (and frame sequence).
Interesting enough, Fusion’s compositing feature works is similar to a build pipeline - a concept familiar to us in programming. Each node in the pipeline is a process that generates an artifact or transforms some input artifact to it’s output, and you can chain and merge each process in the pipeline.
One node’s output is the next one’s input. and each node’s process gets applied to each frame of the input clip.
Each node’s properties can be accessed in the inspector window/panel.
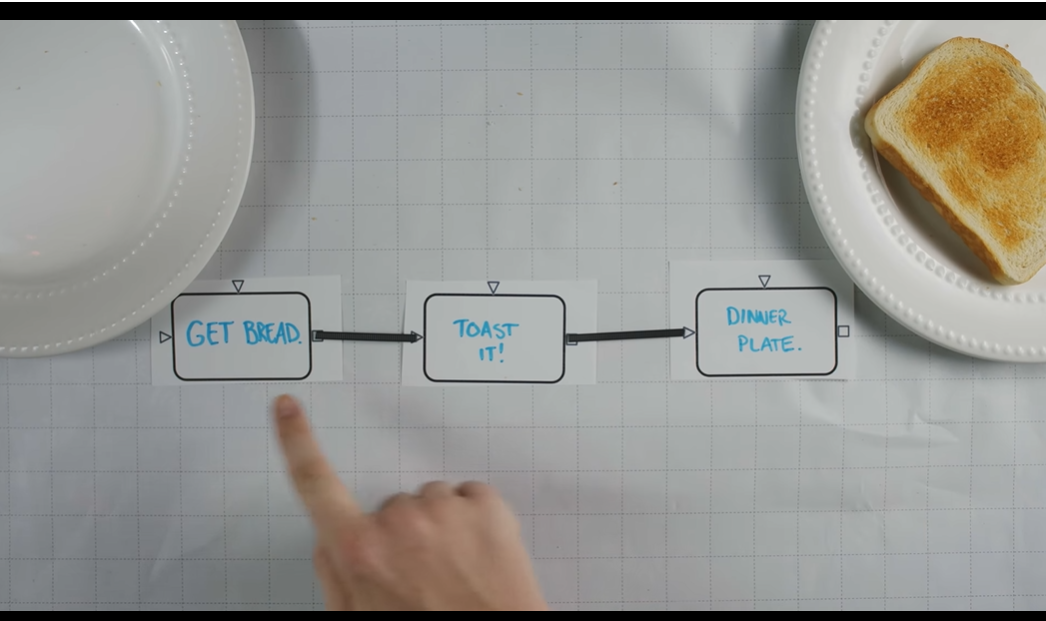 The toast analogy (analog mode) - each node as a step to get to to the desired end result (toast).
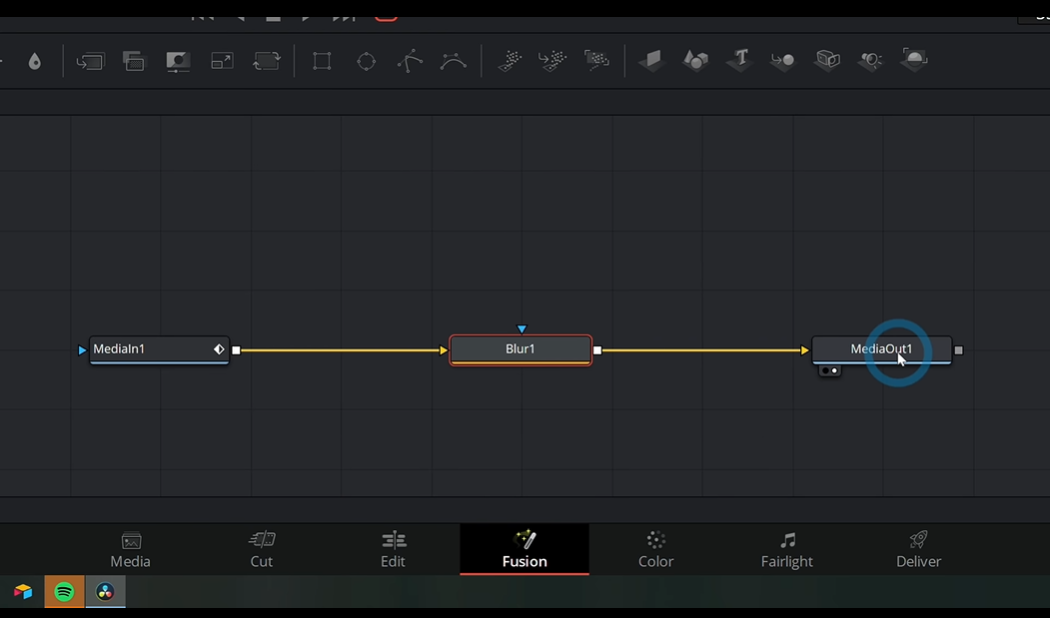 Media in node: input node with some media element from the bin
Blur node : effect node that applies blur to whatever is attached to its input node
Media Out node: output and final node with final rendered element.
Media in node: input node with some media element from the bin
Blur node : effect node that applies blur to whatever is attached to its input node
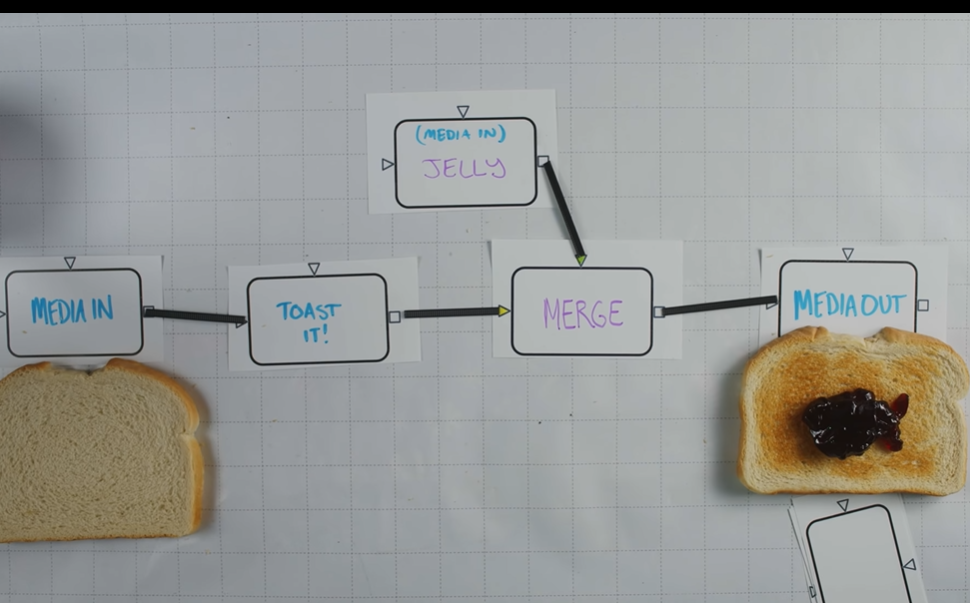
Media Out node: output and final node with final rendered element.The merge node merges content. One piece of content is input as the Merge node’s “background layer”, while the other is the “foreground layer” and is applied over the background.
Inputs can be simple nodes or the result of complex processing.
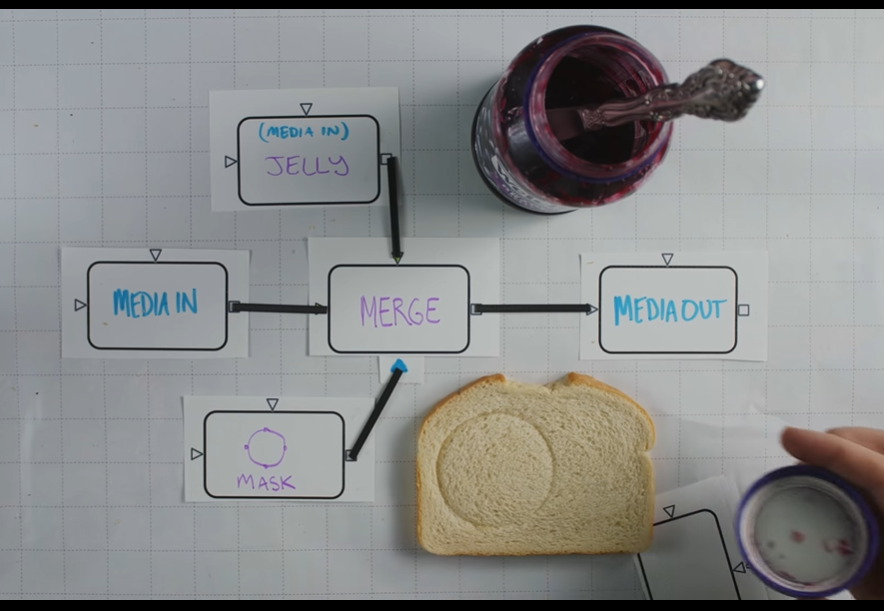
Merges can also receive Masks to define where the merge occurs.
Viewers
There are two viewers. You can look at different parts of the composite, which is great for debugging the composition.
Each node can be placed on any of the viewers. Pressing 1 or 2 on the keyboard selects the viewer for the node. Typically you’ll have Media Out on 2, but you can have any on each.
Keys:
1 - put to viewer 1 2 - put to viewer 2
Node types
Can essentially be grouped into following groups:
- Generators : create or import media (video, image, forms, text…)
- Effects: process and transforms input and generates an output.
- Merge: Combines elements (one input on top of another), and can be chained. Previous merge is generally a background to the next merge
Underlays: allow us to group nodes for better composition organization.
Keys:
Shift + Spacebar: Tool select for quickly adding node by name.
example 1
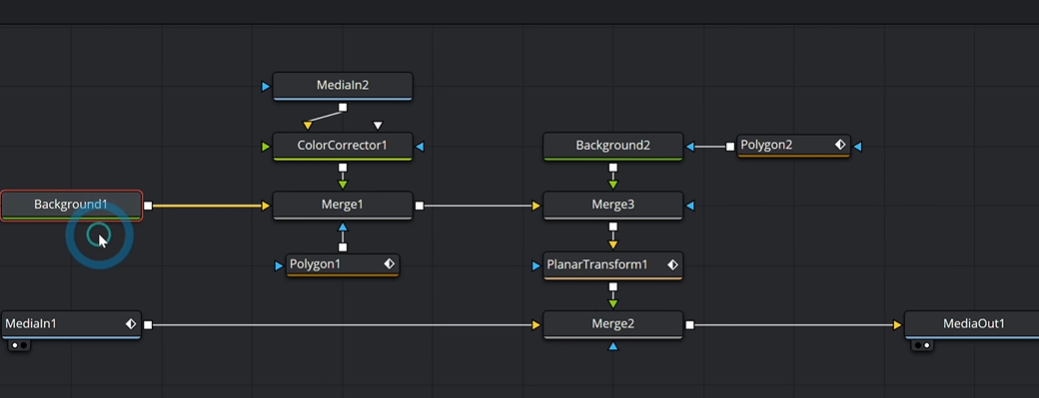
main background: footage of car traveling.
to add the parking lot foreground:
- import parking lot footage,
- color correct it
- merge it with empty background, but apply a polygon mask. Empty background is used, so that merge has a background input.
to add the shadow to the car in the parking,
- polygon creates a mask on a background node to define the shadow form
- merge the shadow with the previous comp, with adequate opacity and apply mode (Multiply)
Planar transform tracks the motion, so the foreground layer comp moves along with the background camera travel.
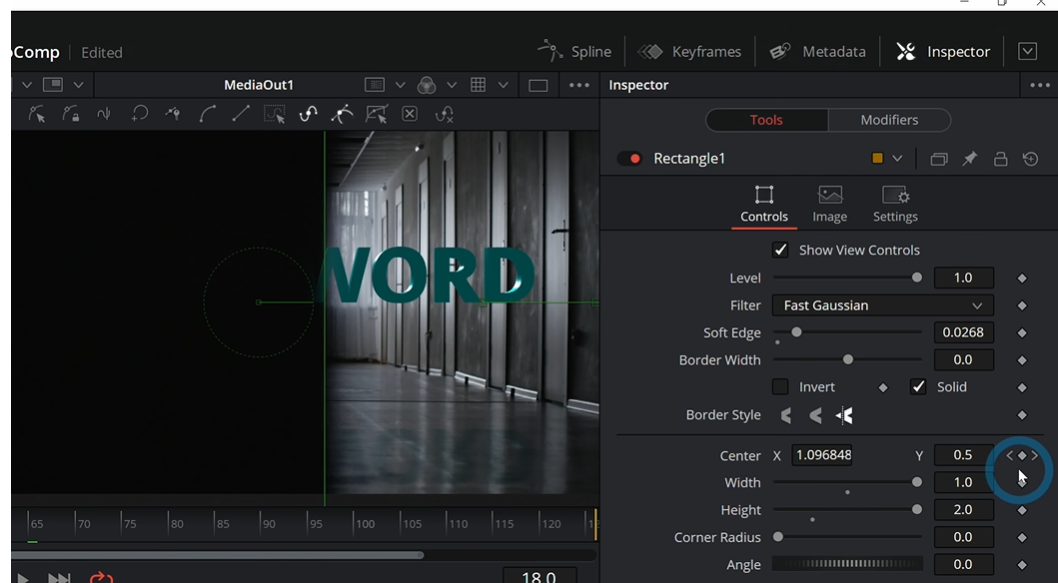 diamond symbols on inspector props are where animations live. clicking the diamond sets keyframes with the values selected at the time selected.
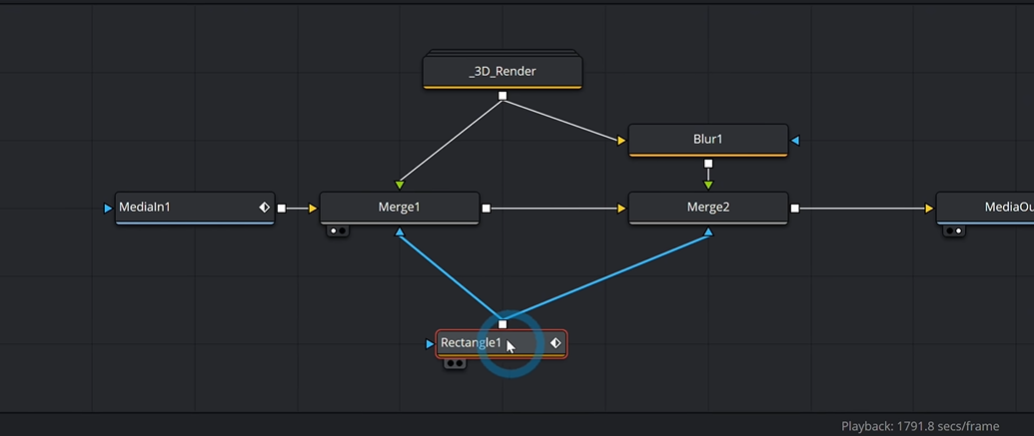 nodes can be attached to multiple outputs for reuse.
Quick tips
- Drag merge node onto a connection inserts it into the connection
- Shift plus draws can add or remove the node from a connection
- select a node and add a merge node using Shift+space will insert the merge AFTER the selected node.
- connect a media node to the output of another node will insert a merge into it.